How I made Build-A-Vessel - Part 1
May 13, 2023
# What is Build-A-Vessel?
Build-A-Vessel is a creative application I started to create in 2022 and have recently finished. It is an online application that enables users to create their own Vessel artworks from a series of randomly picked 3D models which have been broken apart into individual parts and pieces. The application gamifies the art experience, reminiscnet of classic flash games I used to play after school as a kid where you would be given a selection of items or clothes that you could drag around the screen and drop to create an outfit or a object. Build-A-Vessel allows users to piece together these broken fragments, re-forming the objects into something new and unique.
The models used in Build-A-Vessel originally came from a project where I was experimenting with paper collage and 3D modelling, I was imagining these future objects which could either be human sized or hand-held. The functionality and utility of these future objects was left intentioanlly ambiguous so the audience could impart their own function onto these fabricated objects. You can see the collages here and here .
Similar to the way objects and artifacts found through archaeological digs are considered artifacts of the past, these vessels are artifacts of the future. However, when they are broken up into spliced objects, their purpose and design becomes further obscured, and they become mere fragments of something that once existed or will exist. By arranging these pieces into a grid, similar to how archaeological finds are categorized and identified, Build-A-Vessel puts you in charge of the task of reassembling them!
The inspiration for Build-A-Vessel came to me while working on a project that I ultimately lost interest in. As someone who is easily distracted by shiny new ideas, I found myself exploring ideas for incorporating Three.js into my project. Three.js is a JavaScript 3D library that expands on the WebGL API to provide a wider range of options for creating 3D experiences. While browsing the online documentation and examples, I discovered the DragControls.js plugin, which allows for the manipulation of objects and models within a Three.js "Scene". I realized that I could use this plugin to showcase my own models in an interesting way, but soon discovered that my models were too large and unwieldy. To solve this problem, I decided to cut them into smaller sections, and so Build-A-Vessel was born!
# Initializing the project
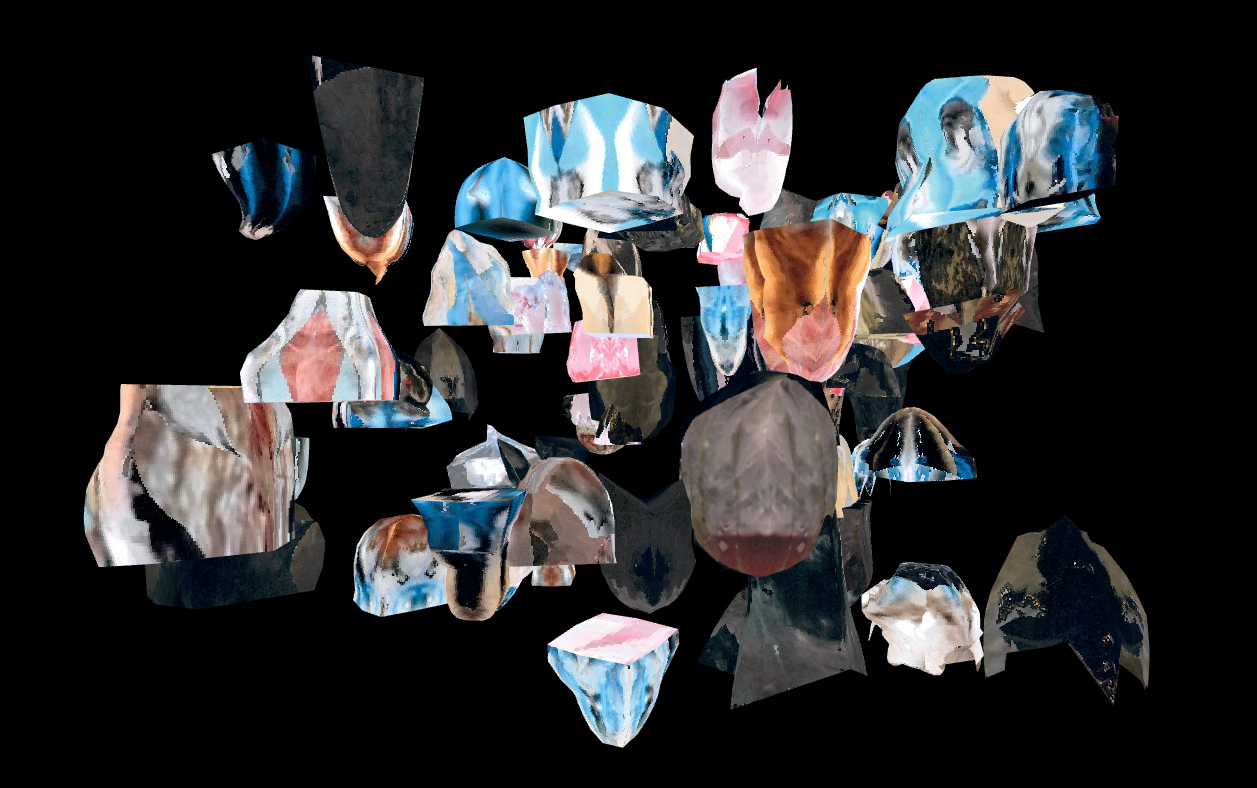
To start I began by copying most the drag controls example from the Three.js documentation. However, instead of using cubes, I imported all of the vessel asset paths from an array called vesselAssets in _config.min.js. From there, I set up a basic scene that included the DragControls plugin. Using a for loop, I loaded the .glb models into the scene by looping through all of the models from the vesselAssets array. Once they had been loaded into the scene, the loaded models then get pushed to the main modelArray. This array was then used by the DragControls plugin to set which objects are to be dragged by these controls.
/* _variables.min.js */


export const vesselPaths = {

    vessel0: "/assets/models/vessels/0.glb",
    vessel1: "/assets/models/vessels/1.glb",
    vessel2: "/assets/models/vessels/2.glb",
    vessel3: "/assets/models/vessels/3.glb",
    vessel4: "/assets/models/vessels/4.glb",
    vessel5: "/assets/models/vessels/5.glb",
    /* etc ... */

};
/* _config_.min.js */


import {vesselPaths as v} from "../js/_variables.min.js";


export const vesselAssets = [
    [
        {
            src: v.vessel0
        },{
            src: v.vessel1
        },{
            src: v.vessel2
        },{
            src: v.vessel3
        },{
            src: v.vessel4
        },{
            src: v.vessel5
        },
        /* etc ... */
    ]
];
/* vessels.min.js */


import * as THREE from 'three';
import {GLTFLoader} from 'three/GLTFLoader.js';
import {DragControls} from 'three/DragControls.js';

import {vesselAssets} from '../js/_config.min.js';

let scene, camera, renderer, dragControls;
const manager = new THREE.LoadingManager();
let object;
const modelArray = [];
let sceneReady = false;

const urlParams = new URLSearchParams(window.location.search);
let groupNumb = parseInt(urlParams.get('id')) > vesselAssets.length ? '0' :
                parseInt(urlParams.get('id')) <= vesselAssets.length ? parseInt(urlParams.get('id')) :
                0;
let currentGroup = vesselAssets[groupNumb];

const loading = document.getElementById('loading');

function sceneSetup() {
    /* scene */
    scene = new THREE.Scene();
    scene.background = new THREE.Color(0x000000);
    camera = new THREE.PerspectiveCamera(75, window.innerWidth / window.innerHeight, 0.1, 2000);

    /* renderer */
    renderer = new THREE.WebGLRenderer({
        alpha: true,
        antialias: true
    });
    renderer.compile(scene, camera);
    renderer.setPixelRatio(window.devicePixelRatio);
    renderer.setSize(window.innerWidth, window.innerHeight);
    document.body.appendChild(renderer.domElement);

    /* drag controls */
    dragControls = new DragControls(modelArray, camera, renderer.domElement);

    /* lights */
    const ambientLight = new THREE.AmbientLight(0xffffff);
    scene.add(ambientLight);

    window.addEventListener('resize', onWindowResize);

    sceneReady = true;
}

function loadAssets() {
    /* load models */
    const loader = new GLTFLoader(manager);
    for (let i = 0; i < currentGroup.length; i++) {

        const obj = currentGroup[i];

        loader.load(obj.src, function (glb) {
            object = glb.scene;

            /* set random rotation */
            object.rotation.y = Math.random() * 4 * Math.PI;

            scene.add(object)
            modelArray.push(object);
        })
    }
}

function onWindowResize() {
    camera.aspect = window.innerWidth / window.innerHeight;
    camera.updateProjectionMatrix();
    renderer.setSize(window.innerWidth, window.innerHeight);

    render();
}

function animate() {
    requestAnimationFrame(animate);
    render();
}

function render() {
    renderer.render(scene, camera);
}

window.onload = function() {
    sceneSetup();
    loadAssets();
    setTimeout(animate, 1000);
    setTimeout(function() {
        loading.classList.add('fade');
    }, 1000);
}
# Adding camera mobility
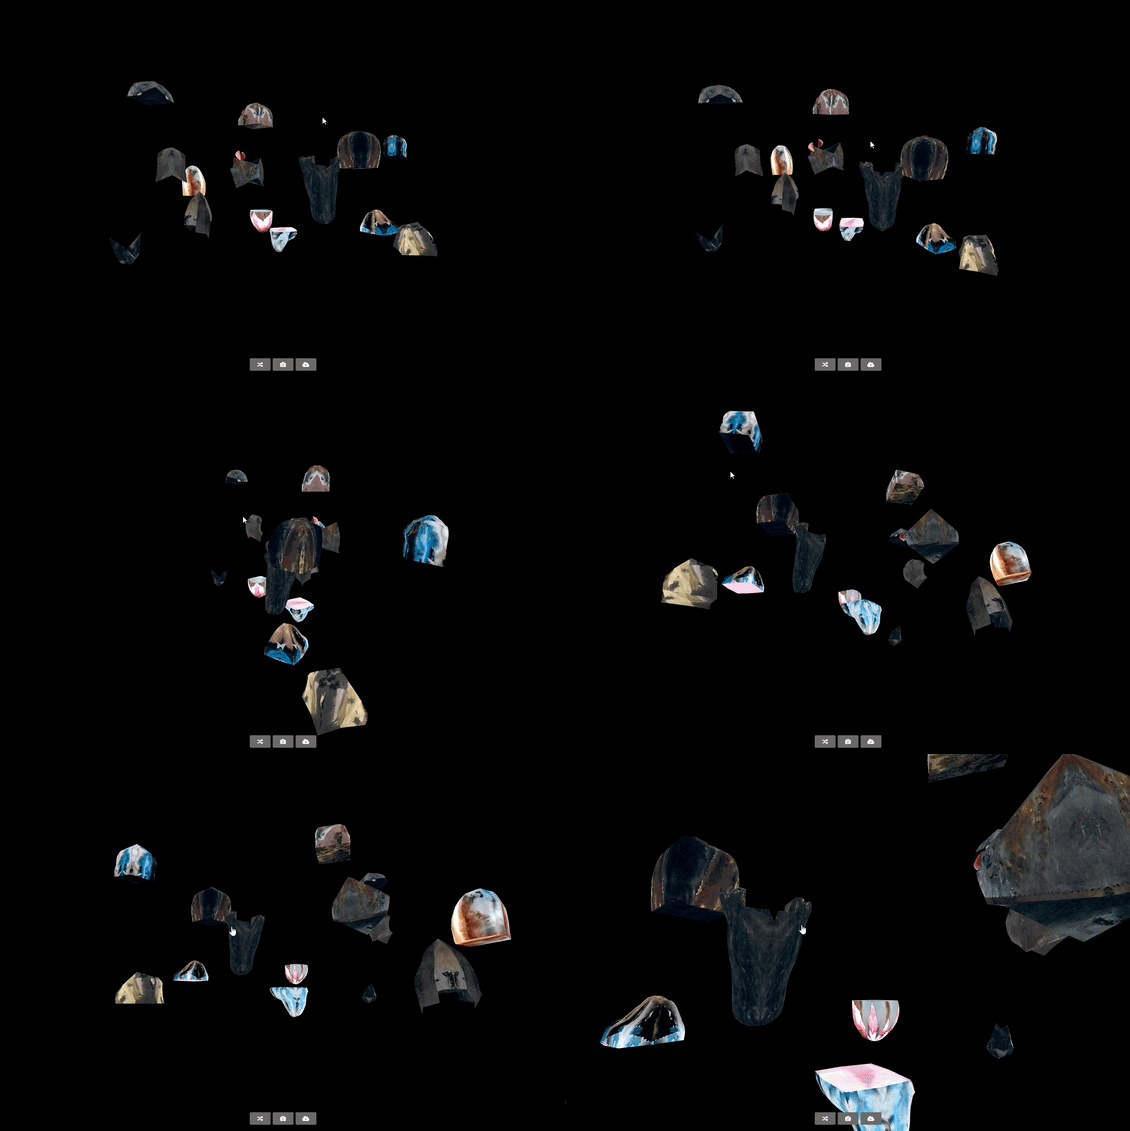
After successfully adding all of the models into the scene and enabling drag controls to move them around, I realized that I wanted to have much more camera mobility in the scene. To achieve this, I combined the DragControls with another kind of controls called OrbitControls.js . With OrbitControls, you are able pan, spin, and zoom the camera around the scene. This allows users to move the camera around more freely which in my opinion makes the application much easier to use and so users can view their vessel creations from a variety of different angles while building them.
/* vessels.min.js */


/* added OrbitControls import */
import {OrbitControls} from 'three/OrbitControls.js';

let orbitControls;

function sceneSetup() {

    /* controls */
    /* orbit */
    orbitControls = new OrbitControls(camera, renderer.domElement);
    orbitControls.update();
    orbitControls.addEventListener('change', render)
    orbitControls.maxDistance = 15;
    orbitControls.enablePan = true;
    orbitControls.panSpeed = 0.5;

    /* drag */
    dragControls = new DragControls(modelArray, camera, renderer.domElement);

    /* added eventListener handlers which enabled the two controls to co-exist, */
    /* when you use the drag controls, orbit controls are disabled, then when */
    /* you stop using drag controls, orbit controls get re-enabled */

    dragControls.addEventListener('dragstart', function() {
        orbitControls.enabled = false;
    });
    dragControls.addEventListener('dragend', function() {
        orbitControls.enabled = true;
    });

}
# Picking and shuffling the models
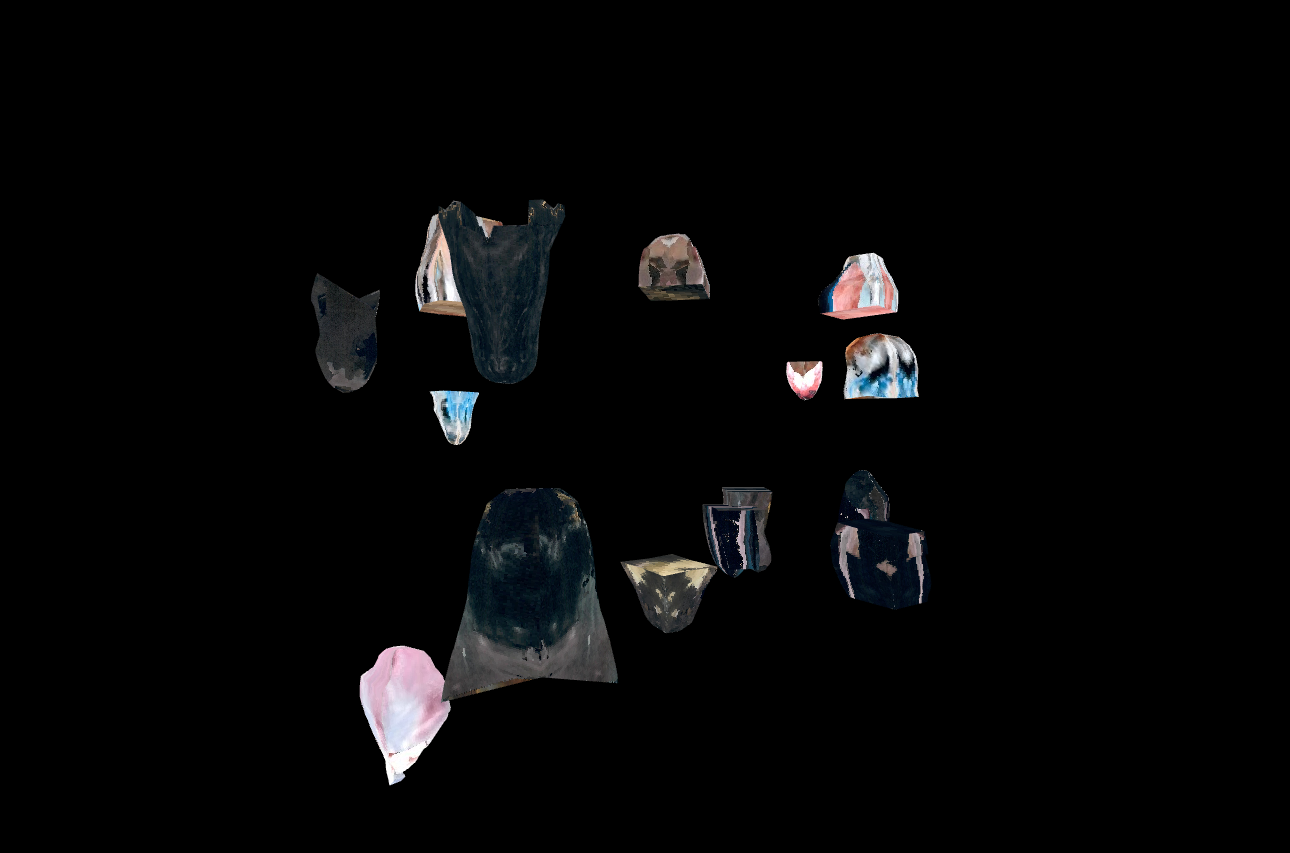
Since there are almost 100 different potential spliced models which can be loaded into the scene, I decided that I wanted to load in a much smaller selection. This makes the application quicker to load and much more manageble. Here's what I did: I took the currentGroup model array, which contained all of the models, and shuffled the array using the commonly used Fisher-Yates shuffle algorithm , which is a technique technique used to randomly shuffle the elements of an array. It iterates over the array in reverse order, and for each element, it selects a random index from the remaining unshuffled portion of the array and swaps the current element with the randomly selected element. I then selected the first 15 models from the shuffled array and shuffled those 15 models again so that their order was fully randomized. Then the chosen 15 models get loaded into the scene and pushed to the modelArray.
After implementing all the shuffling and randomization in the application, I was curious about the total number of possible permutations that could be created. Taking into account the random rotation on the y-axis, the approximate number of Build-A-Vessel permutations is 6.08173 x 10^42, which is an extremely large number: 608,173,145,511,212,917,289,174,621,788,928. However, if we do not include the random y-axis rotation, the number of possible permutations is closer to 2,854,889,312.
/* vessels.min.js */


let numObjects;

function loadAssets() {
    /* shuffle the array containing all of the models */
    for (let i = currentGroup.length - 1; i > 0; i--) {
            const j = Math.floor(Math.random() * (i + 1));
            [currentGroup[i], currentGroup[j]] = [currentGroup[j], currentGroup[i]];
    }

    /* pick the first 15 models from that array */
    currentGroup = currentGroup.slice(0, 15);
    numObjects = currentGroup.length;


    /* shuffle the picked 15 models so their order and position is fully randomized */
    for (let i = numObjects - 1; i > 0; i--) {
        const j = Math.floor(Math.random() * (i + 1));
        [currentGroup[i], currentGroup[j]] = [currentGroup[j], currentGroup[i]];
    }

    /* load models */
    const loader = new GLTFLoader(manager);
    for (let i = 0; i < numObjects; i++) {

        const obj = currentGroup[i];

        loader.load(obj.src, function (glb) {
            object = glb.scene;

            /* Set random rotation */
            object.rotation.y = Math.random() * 4 * Math.PI;

            scene.add(object)
            modelArray.push(object);
        })
    }
}
# Grid layouts and responsive design
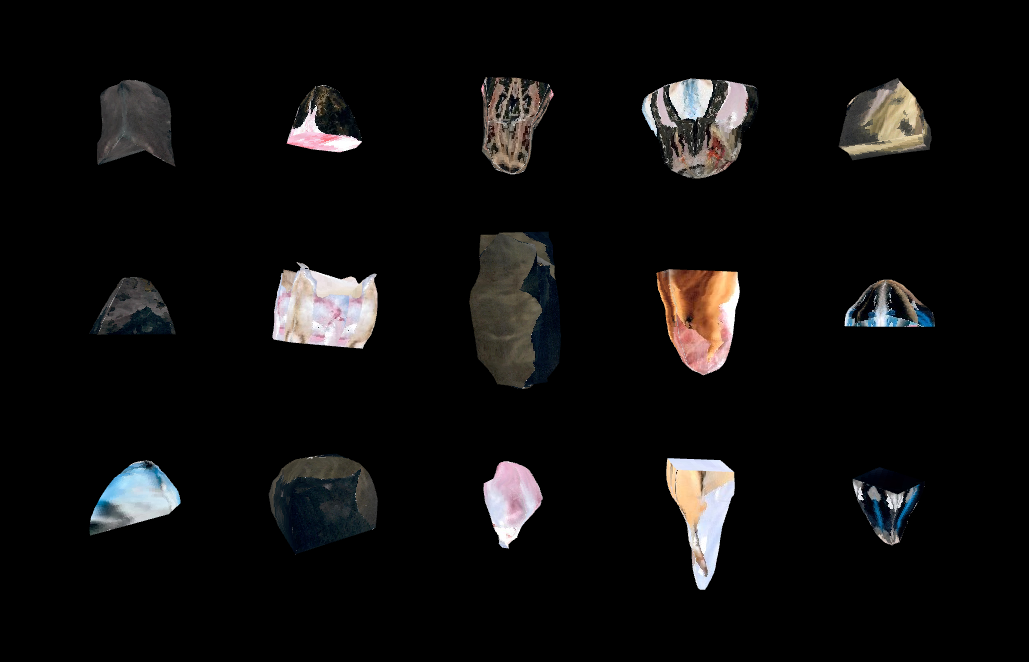
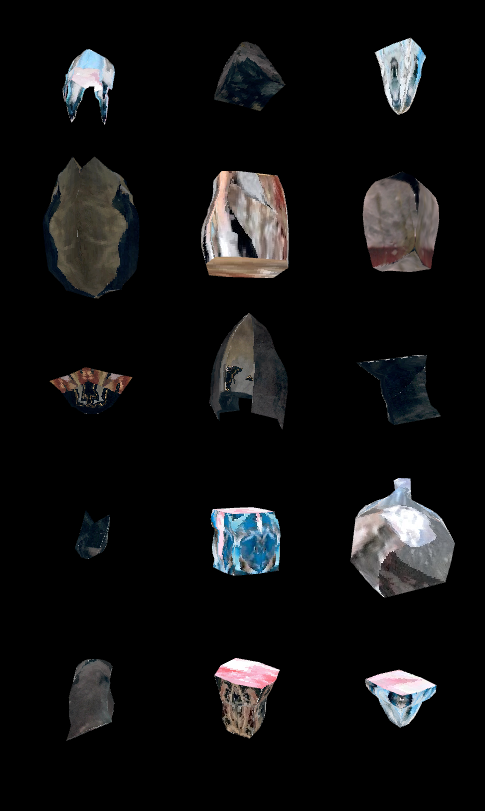
To ensure a better user experience on both desktop and mobile devices, I modified the application to display the 15 random models in an even grid that can adjust to screen size and orientation. Upon loading the models, I aligned their x and z axis positions to a grid. On desktop and landscape monitors, I set the grid rows to 5, and the columns are set to 3. However, if the window.innerWidth is less than or equal to 800 pixels wide, the application automatically adjusted the grid to 3 rows and 5 columns, transforming the grid from landscape to portrait mode. Finally, I adjusted the camera's position to fit the new portrait grid. This modification allowed for a seamless experience across different devices and screen sizes.
/* vessels.min.js */


let numRows, numCols;

function sceneSetup() {

    camera = new THREE.PerspectiveCamera(75, window.innerWidth / window.innerHeight, 0.1, 2000);
    /* adjust camera position on mobile */
    if (window.innerWidth <= 800) {
        camera.position.z = 12;
    } else {
        camera.position.z = 10;
    }
}

function loadAssets() {

    /* define spacing between models */
    let spacing = 3;

    for (let i = currentGroup.length - 1; i > 0; i--) {
            const j = Math.floor(Math.random() * (i + 1));
            [currentGroup[i], currentGroup[j]] = [currentGroup[j], currentGroup[i]];
    }

    currentGroup = currentGroup.slice(0, 15);
    numObjects = currentGroup.length;

    /* adjust grid parameters for mobile screens */
    if (window.innerWidth < 800) {
        numRows = 5;
        numCols = 3;
    } else {
        numRows = 3;
        numCols = 5;
    }

    /* shuffle array */
    for (let i = numObjects - 1; i > 0; i--) {
        const j = Math.floor(Math.random() * (i + 1));
        [currentGroup[i], currentGroup[j]] = [currentGroup[j], currentGroup[i]];
    }

    /* load models */
    const loader = new GLTFLoader(manager);
    for (let i = 0; i < numObjects; i++) {

        const obj = currentGroup[i];

        loader.load(obj.src, function (glb) {
            object = glb.scene;

            /* set grid pattern */
            const row = Math.floor(i / numCols);
            const col = i % numCols;

            /* set position based on grid index */
            const x = (col - (numCols - 1) / 2) * spacing;
            const y = (row - (numRows - 1) / 2) * spacing;

            /* adjust the y position if on mobile */
            if (window.innerWidth <= 800) {
                object.position.set(x, y + 1, 0);
            } else {
                object.position.set(x, y, 0);
            }

            /* set random rotation */
            object.rotation.y = Math.random() * 4 * Math.PI;

            scene.add(object)
            modelArray.push(object);
        })
    }
}
# Adding download functionality
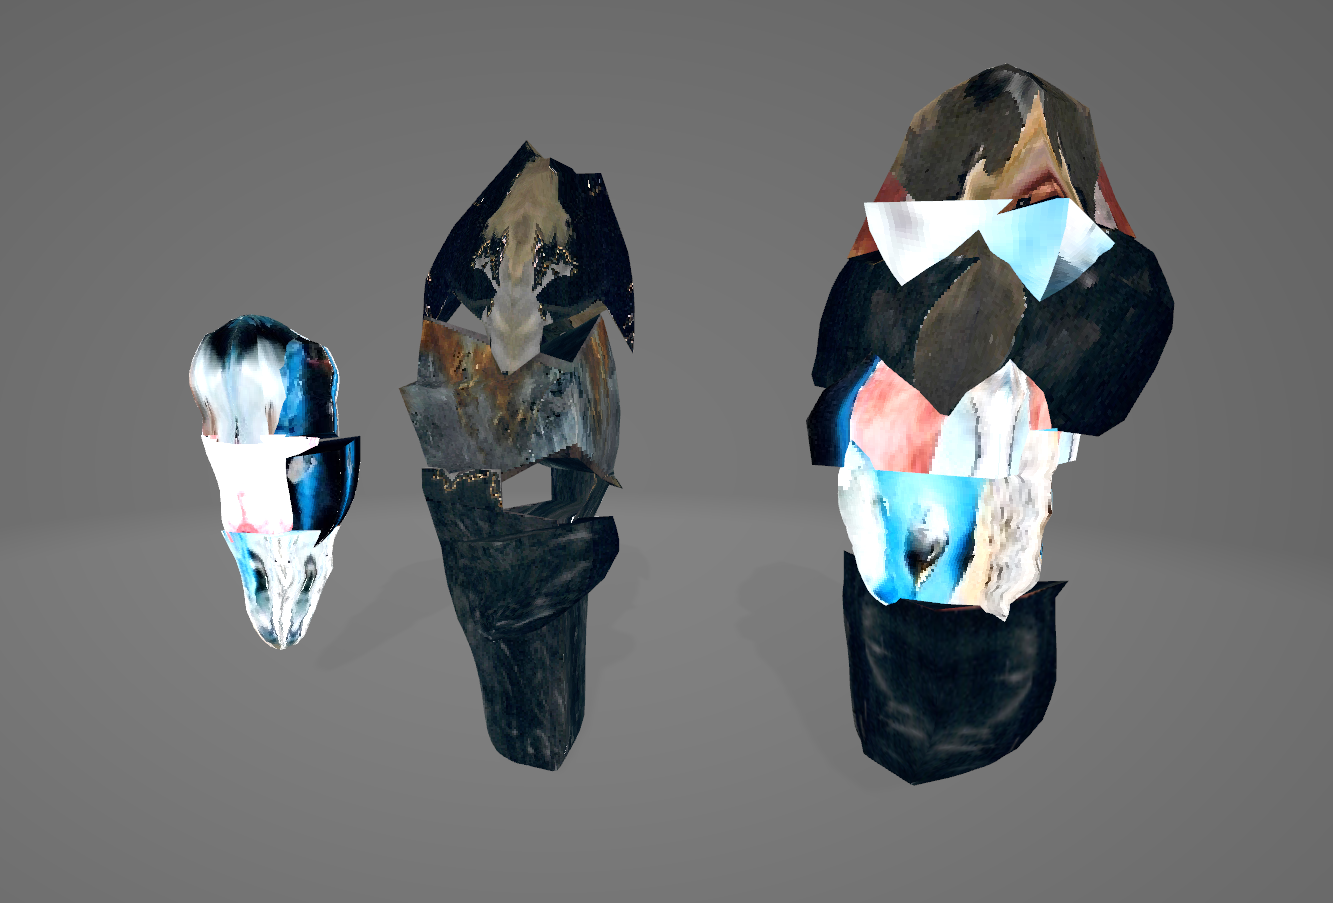
After loading the models into the scene and making them visible on both desktop and mobile, the next step was to provide users with a way to save their creations. To achieve this, the GLTFExporter.js plugin, which is a native plugin of Three.js, was used. This plugin enables users to download any objects or models created in the scene. By adding this feature, users are able to save their Vessels at any stage of their creation.
/* build-a-vessel.njk */


<div id="buttons">
    <p>
        /* add button to the HTML which will be accessed in the javascript */
        <button id="download-glb" title="Save Vessel"><i class="fa-solid fa-cloud-arrow-down"></i></button>
    </p>
</div>
/* vessels.min.js */


/* import GLTFExporter */
import {GLTFExporter} from 'three/GLTFExporter.js';

/* get the HTML download button */
const btn = document.getElementById('download-glb');

function sceneSetup() {

    /* buttons */
    /* add event listeer to the download vessel button */
    btn.addEventListener('click', downloadVessel);
}

/* gltf exporter */
function downloadVessel() {
    const exporter = new GLTFExporter();
    const options = {
        onlyVisible: true,
        binary: true
    };
    exporter.parse(
        scene,
        function(result) {
            saveArrayBuffer(result, `vessel.glb`)
        },
        function (error) {
            console.log('An error happened during parsing', error);
        },
        options
    )
}

const link = document.createElement('a');
link.style.display = 'none';
document.body.appendChild(link);

function save(blob, fileName) {
    link.href = URL.createObjectURL(blob);
    link.download = fileName;
    link.click();
}

function saveArrayBuffer(buffer, fileName) {
    save(new Blob([buffer], {type: 'application/octet-stream'}), fileName);
}
# Finishing touches
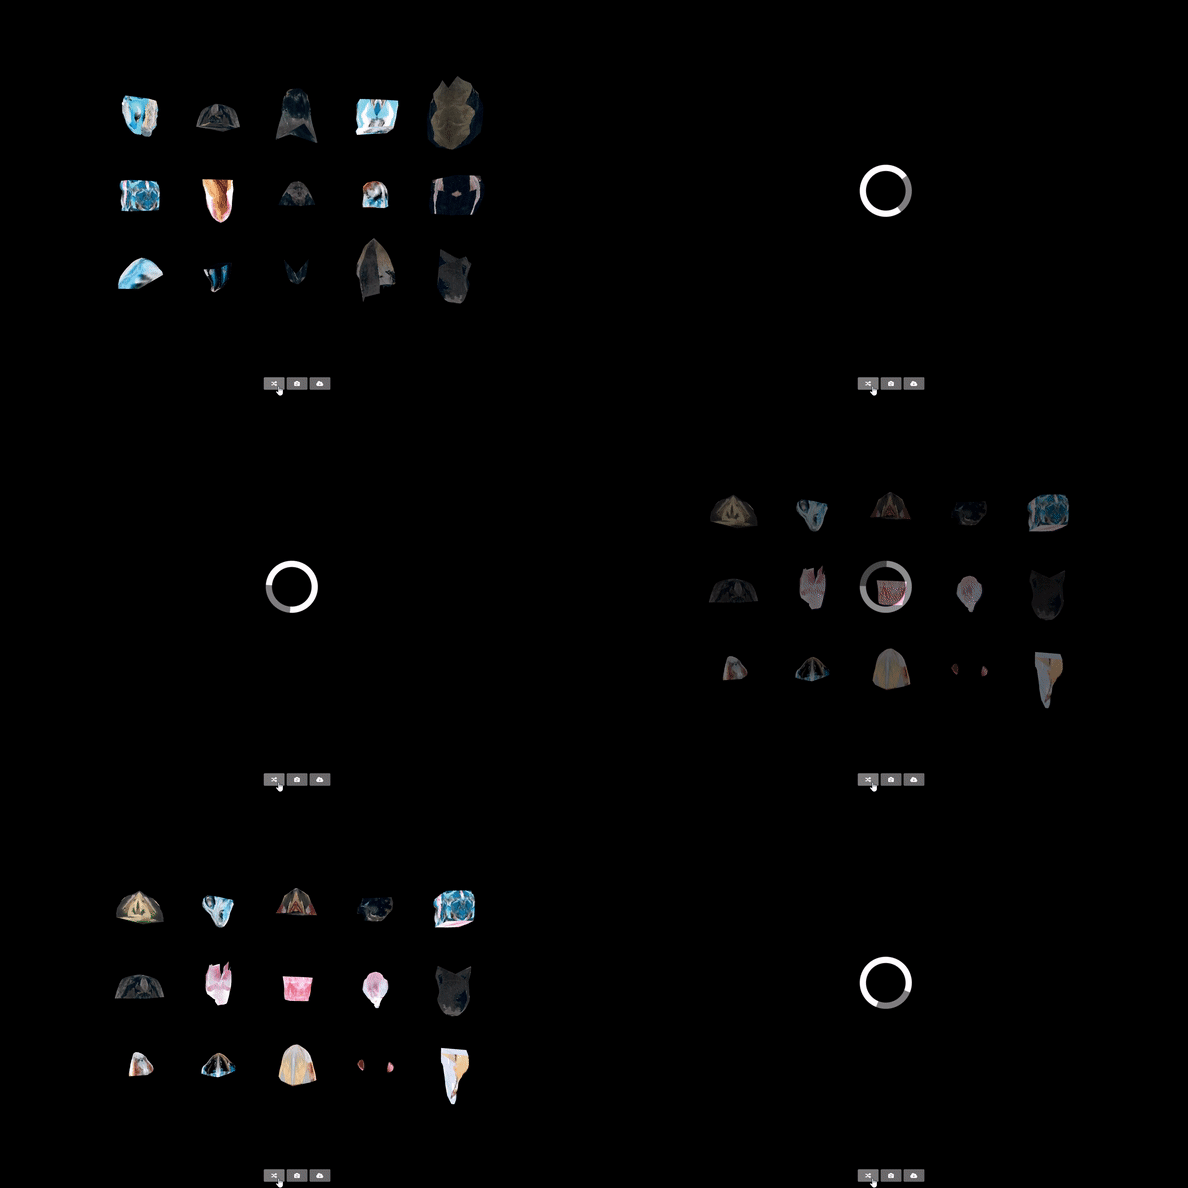
To finish the application, I included several quality-of-life improvements. I included a shuffle button that enables users to reload the application with a new set of models, this button makes it convienient to refresh the application and gives you a new set of vessel parts to work with. As well as this, I also added a reset camera button, which allows users to reset the camera position to its original position.
/* build-a-vessel.njk */


<div id="buttons">
    <p>
        /* add buttons to the HTML which will be accessed in the javascript */
        <button id="shuffle" title="Shuffle"><i class="fa-solid fa-shuffle"></i></button>
        <button id="reset" title="Reset Camera"><i class="fa-solid fa-camera-rotate"></i></button>
        /**/

        <button id="download-glb" title="Save Vessel"><i class="fa-solid fa-cloud-arrow-down"></i></button>
    </p>
</div>
/* vessels.min.js */


const uuidArray = [];

/* get the reset and shuffle buttons */
const resetCameraButton = document.getElementById('reset');
const shuffleButton = document.getElementById('shuffle');

function sceneSetup() {

    /* buttons */
    /* add event listeners to reset button */
    document.body.addEventListener('keydown', function(event) {
        if (event.which == 82) { // R
            resetCamera();
        }
    }, false);
    resetCameraButton.addEventListener('click', resetCamera, false);

    /* add functionality to shuffle button */
    shuffleButton.onclick = function() {
        loading.classList.remove('fade');
        setTimeout(function () {
            /* on window reload append '?id=${uuidArray[0]}' */
            /* uuidArray[0] will be a unique random string of numbers */
            window.location.href = `?id=${uuidArray[0]}`;
        }, 1200)
    }
}

function generateUUID() {
    /* generate a random number */
    const uuid = Math.floor(Math.random() * 100000);
    /* push the unique number to the array */
    /* this number will be used when downloading the model */
    /* and when appending a unique id to the url */
    uuidArray.push(uuid);
    return uuid;
}

function resetCamera() {
    /* when the reset button is clicked the orbit controls reset to their original position */
    orbitControls.reset();
}
# What's next?
Add model grouping:
I would like to add functionality which is in the original DragControls example which allows you to select multiple objects and add them to a group. This means that when you add models to join into a group, when you drag them they move all move together as one. I think this would improve the usabilty of the application and make it easier to position in-progress or finished vessels.
Add camera screenshots:
For users who are on mobile or are not able to view the downloaded .glb vessel models, I would like to add a button which takes a screenshot image of the current camera view and saves it. This is so that all users can have the option to save their Build-A-Vessel creations regardless of which device they are on!
Add accessibility options:
I would like to make Build-A-Vessel and any other applications I might make in the future to be as fully accessible as I can. To do this I would use something like @react-three/a11y which is a WebGL accessibility plugin that can add components like: Focus and focus indication, tab indexing and keyboard navigation, screen reader support and alt-text, roles, cursor shapes, and descriptive links.
Exhibiting:
I would like to exhibit Build-A-Vessel in some capacity, I would like to develop a way to put the application onto touch screen monitors powered by something like a Raspberry Pi so that the monitors can be portable or included in some kind of multi-media installation.
Saving models when installed in an exhibition:
I would also like to develop some way for users who do use the Build-A-Vessel application at an exhibition to save their models in a way where they get to keep them, using the online application and saving models is very easy as you have your own device. But at an exhibition the application will be on a private device, so I would like to find a way to either save the models to a server which then get uploaded to an archive that can be accessed and downloaded by the public, or for the finished vessels to be sent via email. Or the models can be saved onto a USB with a custom 3D modelled Vessel casing.
Try out Build-A-Vessel
Got some feedback? Contact
# Updates
Update: 15/05/2023
Added camera screenshots:
Added the ability to capture and save a screenshot from the current camera view. This works both on mobile and pc. To save a jpeg screenshot image just adjust the camera to the exact view you want and then press the "Take Camera Screenshot" button! It will download automatically to your device.
/* build-a-vessel.njk */


<div id="buttons">
    <p>
        /* add the button to the HTML so we can access this in the javascript and add functionality */
        <button id="save-img" title="Take Camera Screenshot"><i class="fa-solid fa-image"></i></button>
    </p>
</div>
/* vessels.min.js */


/* get the save-img button from HTML */
const imageScreenshotButton = document.getElementById('save-img');

function sceneSetup() {

    renderer = new THREE.WebGLRenderer({
        alpha: true,
        antialias: true,

        /* add preserveDrawingBuffer to your renderer, */
        /* this flag will get the base64 encoding of the current frame */
        preserveDrawingBuffer: true
    });

    /* add event listeners to the button and attach savAsImage to run when button is clicked */
    imageScreenshotButton.addEventListener('click', saveAsImage);
}

function saveAsImage() {

    let imgData;

    try {
        /* set the dowload image file to be jpeg */
        const strMime = "image/jpeg";
        const strDownloadMime = "image/octet-stream";
        imgData = renderer.domElement.toDataURL(strMime);

        /* run the save function */
        saveFile(imgData.replace(strMime, strDownloadMime), `vessel-${groupID}.jpg`);

    } catch (e) {
        console.log(e);
        return;
    }
}

function saveFile(strData, fileName) {

    const link = document.createElement('a');

    /* check if jpeg is supported by the browser */
    if (typeof link.download === 'string') {

        /* if it is, append the 'link' and set variables */
        document.body.appendChild(link);

        link.download = fileName;
        link.href = strData;
        link.click();

        /* remove anchor tag from body */
        document.body.removeChild(link);

    } else {

        /* if jpeg is not supported by the browser, */
        /* download file data without jpeg extention */
        /* users can then append the file extention themselves */
        /* and convert to whichever file format they want */

        location.replace(uri);
    };
}
